DeShack

Tutorials on Linux, WordPress and web APIs

Archives (page 2 of 2)

WordPress Hooks Explained: Actions vs Filters with Real Examples

If you’ve been working with WordPress for more than a week, you’ve probably heard the word “hooks” thrown around. Most tutorials describe them abstractly – event-driven architecture, observer pattern, blah blah. Let me skip that and go straight to what you actually need to know to use them.

The core difference

WordPress has two types of hooks: actions and filters.

Actions let you do something at a specific point in WordPress execution. You’re not expected to return anything – you just run your code and get out. Filters let you modify a value that WordPress is about to use. You receive the value, change it however you want, and return it. That return is not optional – if you forget it, things break in weird ways.

I’ve seen junior developers use add_action where they needed add_filter and then spend an hour wondering why their changes weren’t showing up. The rule is simple: if you’re transforming data, use a filter. If you’re just reacting to an event, use an action.

add_action in practice

The most common use case is hooking into WordPress’s initialization cycle. Here’s something I use in almost every theme – enqueueing scripts and styles properly instead of hardcoding them into templates:

function mytheme_enqueue_assets() {
    wp_enqueue_style(
        'mytheme-main',
        get_stylesheet_uri(),
        array(),
        '1.0.0'
    );

    wp_enqueue_script(
        'mytheme-app',
        get_template_directory_uri() . '/js/app.js',
        array( 'jquery' ),
        '1.0.0',
        true
    );
}
add_action( 'wp_enqueue_scripts', 'mytheme_enqueue_assets' );

The third argument to add_action is priority (default 10). Lower numbers run first. If you need to load something after another plugin has loaded its scripts, bump your priority to 20 or 30. I’ve had to do this with WooCommerce hooks more than once.

A second practical example – running code after a post is published:

function notify_on_publish( $new_status, $old_status, $post ) {
    if ( $new_status === 'publish' && $old_status !== 'publish' ) {
        // send a Slack notification, clear a cache, whatever
        do_something_with( $post->ID );
    }
}
add_action( 'transition_post_status', 'notify_on_publish', 10, 3 );

Note the fourth argument: 3. That tells WordPress to pass 3 arguments to your callback. The default is 1, and if you forget to specify this when your hook passes multiple arguments, you’ll only get the first one.

add_filter in practice

Filters are where things get interesting. One of the most-used filters is the_content, which runs on post content before it’s displayed:

function append_reading_time( $content ) {
    if ( ! is_single() ) {
        return $content;
    }

    $word_count = str_word_count( strip_tags( $content ) );
    $minutes    = max( 1, ceil( $word_count / 200 ) );
    $label      = $minutes === 1 ? '1 min read' : $minutes . ' min read';

    $suffix = '<p class="reading-time">' . esc_html( $label ) . '</p>';

    return $content . $suffix;
}
add_filter( 'the_content', 'append_reading_time' );

I’d recommend testing this kind of thing in your local WordPress dev environment first – filters on the_content can interact badly with page builders and block editor plugins if you’re not careful about the context check.

Another filter I use often is login_redirect. By default WordPress dumps everyone on the dashboard after login. This changes it based on role:

function custom_login_redirect( $redirect_to, $request, $user ) {
    if ( isset( $user->roles ) && is_array( $user->roles ) ) {
        if ( in_array( 'subscriber', $user->roles, true ) ) {
            return home_url( '/my-account/' );
        }
    }
    return $redirect_to;
}
add_filter( 'login_redirect', 'custom_login_redirect', 10, 3 );

Creating your own hooks

You’re not limited to hooks WordPress provides. In plugins or themes with multiple components, defining your own hooks is a clean way to let other code extend your functionality without editing your files directly. Use do_action() to fire an action and apply_filters() to create a filter point:

// In your plugin, fire an action at a logical point
do_action( 'myplugin_after_process', $result, $user_id );

// Create a filter so output can be modified externally
$output = apply_filters( 'myplugin_output_html', $default_html, $context );

This pattern is worth learning early – it’s how good plugins stay extensible without turning into spaghetti.

A few things that trip people up

  • Not returning in a filter callback. If you add a filter and forget return $value, WordPress gets null back. The content disappears or the option resets to empty. Always return.
  • Wrong argument count. When a hook passes 2+ arguments, you must set the fourth parameter of add_action/add_filter to match. Default is 1.
  • Hooking too late. Some hooks like init fire early in the request cycle. If you’re registering post types or taxonomies, you need to be there. Hooking into wp_loaded or later won’t work for those.
  • Naming collisions. If you name your callback function something generic like enqueue_scripts, another plugin might define the same function and cause a fatal error. Prefix everything with your theme or plugin slug.

The WordPress developer docs on hooks are actually quite good and list all the core hooks by category. Once you have the mental model down, that reference is all you need.

Removing hooks

One more thing worth knowing: you can remove hooks with remove_action and remove_filter. This is useful when a plugin or theme attaches a callback you want to override or disable entirely. The catch is timing – you have to call remove_action after the original add_action has run, but before the hook fires. Getting the priority right matters here too. If the original was added at priority 10, you have to remove it at priority 10 as well, otherwise WordPress won’t find it to remove.

Hooks are probably the single most important concept to internalize when working with WordPress. Everything else – themes, plugins, the block editor’s server-side rendering – builds on top of this system. Get comfortable with them early and the rest of WordPress development becomes a lot more predictable.
Hardening a Fresh Ubuntu VPS: A 20-Minute Checklist

Every time I spin up a new VPS I run through the same set of steps before I put anything on it. It takes about 20 minutes and covers the most common attack vectors for an internet-facing Linux server. None of this is exotic – it’s mostly well-established practice – but having a checklist means I don’t skip a step because I’m in a hurry.

This is for Ubuntu 22.04 LTS or 24.04 LTS. Most steps work on Debian with minor adjustments.

1. Create a non-root user and lock down SSH

Log in as root one last time, create a regular user, and add it to the sudo group:

adduser deploy
usermod -aG sudo deploy

Copy your SSH public key to the new user (from your local machine):

ssh-copy-id deploy@your-server-ip

Or paste it manually into /home/deploy/.ssh/authorized_keys with permissions 700 on the directory and 600 on the file.

Now edit /etc/ssh/sshd_config and set these values:

PermitRootLogin no
PasswordAuthentication no
PubkeyAuthentication yes
AuthorizedKeysFile .ssh/authorized_keys
X11Forwarding no

Reload SSH – but don’t close your current session yet:

systemctl reload sshd

Open a new terminal and verify you can log in as your new user before closing the root session. Getting locked out here is embarrassing and fixable only through the provider’s console.

2. Configure ufw

Ubuntu ships with ufw (Uncomplicated Firewall) which wraps iptables into something manageable. Default policy is deny incoming, allow outgoing:

ufw default deny incoming
ufw default allow outgoing
ufw allow ssh
ufw allow 80/tcp
ufw allow 443/tcp
ufw enable

If you’re running something else – a game server, a custom port, a mail relay – add those rules before enabling. Check status with ufw status verbose.

If SSH is on a non-standard port, use ufw allow PORT/tcp instead of ufw allow ssh. The named rule just resolves to port 22.

3. Install and configure fail2ban

fail2ban watches log files for repeated failed authentication attempts and temporarily bans the source IP via iptables. It won’t stop a determined attacker but it kills the noise from automated scanners almost completely.

apt install fail2ban -y

Create a local override file rather than editing the defaults directly:

cp /etc/fail2ban/jail.conf /etc/fail2ban/jail.local

Edit /etc/fail2ban/jail.local and adjust the [sshd] section:

[sshd]
enabled = true
port = ssh
maxretry = 5
bantime = 1h
findtime = 10m

Start and enable it:

systemctl enable --now fail2ban

Check ban status with fail2ban-client status sshd. See the Wikipedia article on Fail2ban for a quick overview of how the detection mechanism works.

4. Enable unattended security upgrades

apt install unattended-upgrades -y
dpkg-reconfigure --priority=low unattended-upgrades

Answer yes when prompted. This configures the system to automatically apply security updates only – not dist-upgrades or optional package updates, which is the conservative setting you want on a server.

Check the config in /etc/apt/apt.conf.d/50unattended-upgrades if you want to tweak what gets installed. The Ubuntu documentation on automatic security updates has good coverage of the available options.

5. A few sysctl tweaks

Edit /etc/sysctl.conf (or drop a file in /etc/sysctl.d/) and add:

# Disable IP source routing
net.ipv4.conf.all.accept_source_route = 0
net.ipv6.conf.all.accept_source_route = 0

# Ignore ICMP redirects
net.ipv4.conf.all.accept_redirects = 0
net.ipv6.conf.all.accept_redirects = 0

# Enable SYN flood protection
net.ipv4.tcp_syncookies = 1

# Disable IPv6 if you're not using it
net.ipv6.conf.all.disable_ipv6 = 1
net.ipv6.conf.default.disable_ipv6 = 1

Apply without rebooting:

sysctl -p

The IPv6 disable lines are optional – skip them if you’re using IPv6 or might need it. The rest are low-risk defaults that reduce the attack surface without affecting normal traffic.

Bonus: change the default SSH port

Controversial suggestion: moving SSH off port 22 doesn’t add real security, but it does dramatically reduce the noise in your auth logs, which makes it easier to spot anything genuinely suspicious. If you do this, update your ufw rule before restarting sshd:

ufw allow 2222/tcp
ufw delete allow ssh

Then edit /etc/ssh/sshd_config and change Port 22 to Port 2222 (or whatever you pick). Remember to update your SSH client config (~/.ssh/config on your local machine) with Port 2222 for the host, otherwise every login requires ssh -p 2222 deploy@host.

If you’re on a cloud provider that uses a security group layer (AWS, GCP, DigitalOcean), update that rule too – the provider’s firewall is separate from ufw and blocking port 22 at the OS level while the cloud firewall still allows it doesn’t actually close anything.

Done – for now

Twenty minutes and you’ve covered the basics: no root SSH login, key-only authentication, a firewall with a minimal open port list, automatic brute-force banning, automatic security patches, and a handful of kernel network settings. This won’t protect against every possible attack, but it handles the vast majority of automated scanning and credential stuffing attempts you’ll see against any internet-facing server. From here, hardening gets more specific to whatever you’re actually running – web server config, database access controls, AppArmor profiles, and so on.

REST vs GraphQL vs gRPC: Choosing an API Style for Small Projects

Every few months someone posts a “GraphQL killed REST” or “gRPC is the future” article and the comments fill up with strong opinions. Having built APIs in all three styles across various projects – some small SaaS products, some internal tooling, one mobile app backend – I’ve landed on a fairly boring conclusion: REST is the right default for small projects, and you should deviate from it only when you have a concrete reason to.

Here’s how I actually think about the tradeoffs.

REST: boring in the best way

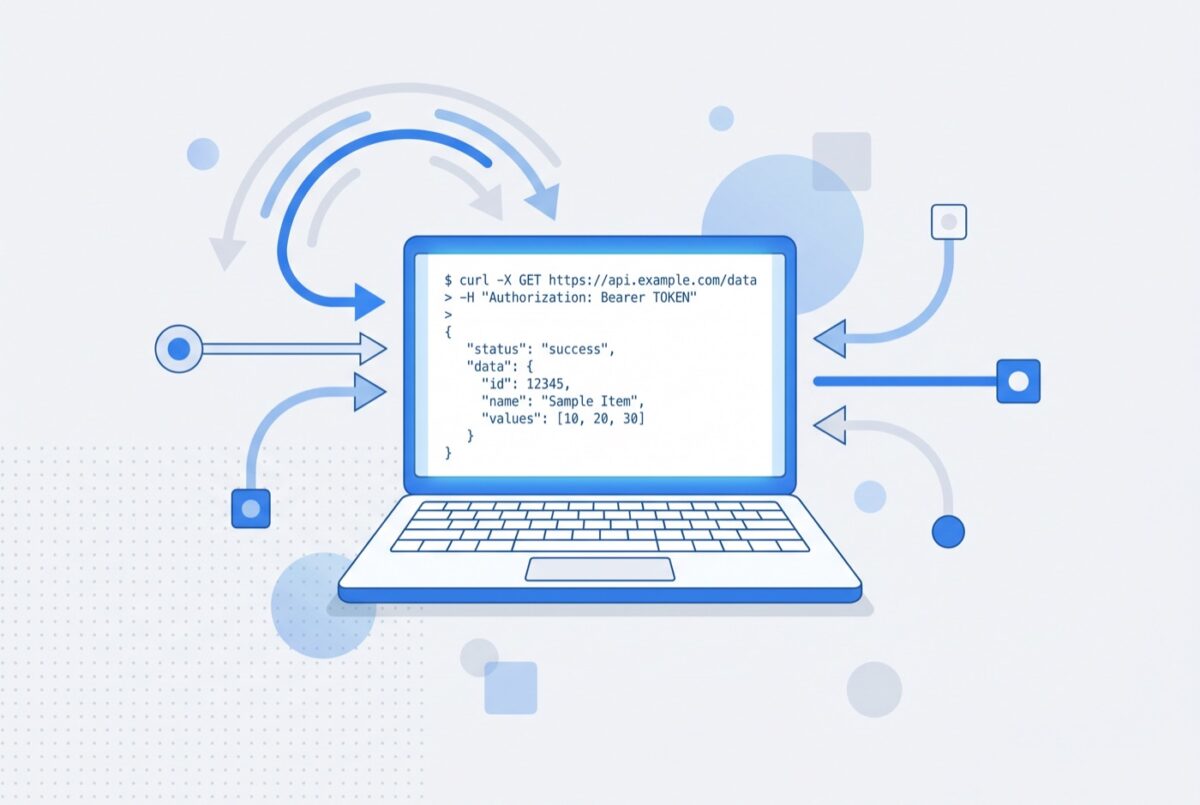
REST over HTTP/JSON is what every developer already knows, every client library supports, and every proxy, gateway, and monitoring tool understands. It has no required build step, no schema to compile, and curl is all you need to debug it.

For a small project – a side project, a simple internal API, a startup’s first backend – the main thing that kills you is complexity you didn’t need. REST keeps the operational surface small. You get standard HTTP status codes, cacheable GET responses, and a mental model that maps cleanly to database resources.

The criticism usually leveled at REST for small projects is over- and under-fetching: you get more data than you need, or you need multiple requests to build a page. Both are real, but they’re usually not a problem at small scale. If your API has ten endpoints and the biggest response is a few kilobytes, optimizing for network efficiency is premature. Build the thing first.

REST is also the de facto standard for public APIs, which matters more than people admit. If you ever want to document and publish your API, REST with OpenAPI is the path that third-party developers expect. Real-world payment API integration is a good example of this in practice – public financial APIs almost universally use REST because the tooling ecosystem around authentication, versioning, and documentation is mature and widely understood.

GraphQL: useful when your clients have different data needs

GraphQL solves a specific problem: multiple clients (say, a mobile app and a web dashboard) that need different shapes of the same data. Instead of versioning your API or building bespoke endpoints, you expose a single typed schema and let clients ask for exactly what they need.

That’s genuinely useful. But it comes with real costs for a small team:

  • You need a schema definition and a resolver layer, which is more upfront work than REST routes
  • Caching is harder because everything goes to POST /graphql by default – you lose HTTP caching semantics
  • N+1 query problems appear quickly and require DataLoader or similar batching patterns to fix
  • Tooling like API gateways and monitoring tools need GraphQL-aware configuration

I’ve used GraphQL successfully on a project with a React web app and a React Native mobile app sharing a backend. Having one schema that both clients query made sense. For a project with a single client, I’d think hard about whether I’m buying complexity I don’t need. See graphql.org/learn for the official introduction if you want to evaluate it properly.

gRPC: the right tool for a specific job

gRPC uses Protocol Buffers over HTTP/2 and is optimized for high-throughput, low-latency communication between services. It’s excellent for internal microservice communication where you control both ends of the connection and you care about performance.

For small projects, the overhead is usually not worth it. You need to:

  1. Define your service in a .proto file
  2. Run the protoc compiler to generate client and server stubs in your language
  3. Keep the generated code in sync across services as the schema evolves
  4. Handle the fact that browsers can’t use gRPC directly (you need grpc-web or a proxy layer)

That’s a meaningful toolchain to maintain. The payoff – binary encoding, multiplexing, bidirectional streaming, generated typed clients – is real, but you need to be at a scale where it matters. grpc.io describes the use cases well. The short version: gRPC shines when you’re building internal service-to-service communication at scale, not when you’re building a CRUD API for a web app with two hundred users.

What about tRPC?

If you’re working in a TypeScript-first stack where the client and server are in the same repo, tRPC is worth a look. It gives you end-to-end type safety without a schema compilation step – you define procedures on the server and they’re automatically typed on the client. The constraint is that it only works when both sides are TypeScript, and it’s not a great fit for public APIs that third-party developers will consume.

I mention it because it addresses the “I want GraphQL-style type safety without the overhead” desire that often shows up in small TypeScript projects. It’s not a replacement for REST or GraphQL in all cases, but if your specific situation is a Next.js app with its own API layer, it can eliminate a lot of boilerplate.

A decision tree that actually fits on one screen

Start with REST. Move to GraphQL if you genuinely have multiple clients with divergent data needs and you’ve felt the pain of over-fetching or endpoint proliferation. Move to gRPC if you’re building internal microservices and have profiled a real latency or throughput bottleneck. Consider tRPC if you’re in a TypeScript monorepo and want type-safe API calls without generated code.

“We might need GraphQL later” is not a reason to use GraphQL now. Migrations between API styles are annoying, but they’re not impossible, and building the right thing for your current scale is usually better than building for a scale you haven’t reached. REST has carried projects from prototype to millions of users plenty of times. The familiarity of the format means fewer surprises, faster onboarding for collaborators, and a shorter path to documentation and third-party integrations. For small projects, that matters.

Systemd Timers vs Cron: When to Use Which

Cron has been scheduling jobs since the 1970s and it still works fine. But if your server is already running systemd – which it almost certainly is on any modern Ubuntu, Debian, or Fedora box – you have a second option that integrates more tightly with the rest of the system. I spent a while being skeptical of systemd timers because the unit file syntax felt verbose for something cron handles in one line. Then I ran into a few real situations where that verbosity actually paid off.

Cron: the quick and familiar path

Crontab syntax is compact. Run something every day at 3am:

0 3 * * * /usr/local/bin/backup.sh >> /var/log/backup.log 2>&1

That’s it. The job runs as the user who owns the crontab, output goes to a log file (or gets emailed if you configure MAILTO), and you manage everything with crontab -e. System-level jobs go in /etc/cron.d/ or the hourly/daily/weekly/monthly directories under /etc/cron.*.

Where cron gets annoying:

  • No native dependency tracking – if a job needs the network to be up, you handle that inside the script
  • Output handling is clunky – either redirect to a file or set up a mail relay, neither of which is great
  • No built-in catch-up for missed runs (unless you use anacron)
  • Race conditions when multiple crons overlap – you have to implement locking yourself with flock

See the Wikipedia article on Cron for a good overview of the syntax variants across platforms – there are subtle differences between Vixie cron, Busybox cron, and others.

Systemd timers: more setup, more features

A systemd timer is actually two unit files: a .timer that defines the schedule, and a .service that defines what runs. Verbose, yes. But the service file gives you dependency ordering, resource limits, sandboxing, and journal logging for free.

Example: a daily database backup. Create /etc/systemd/system/db-backup.service:

[Unit]
Description=Daily database backup
After=network.target mysql.service
Requires=mysql.service

[Service]
Type=oneshot
User=backup
ExecStart=/usr/local/bin/db-backup.sh
StandardOutput=journal
StandardError=journal

Then /etc/systemd/system/db-backup.timer:

[Unit]
Description=Run db-backup daily at 03:00

[Timer]
OnCalendar=*-*-* 03:00:00
Persistent=true
RandomizedDelaySec=300

[Install]
WantedBy=timers.target

Enable and start it:

systemctl daemon-reload
systemctl enable --now db-backup.timer

Check the next scheduled run and recent history:

systemctl list-timers db-backup.timer
journalctl -u db-backup.service --since "24 hours ago"

A few things worth pointing out here. Persistent=true means if the machine was off at 3am, the job runs shortly after the next boot – that’s the anacron behavior built in. RandomizedDelaySec=300 spreads the load if you have many timers firing at the same clock time. And because output goes to the journal, you get structured logs you can query with journalctl instead of grepping flat files.

The After=mysql.service line is the part cron simply can’t do: the job won’t run if MySQL isn’t up. For a backup script that’s fairly important.

OnCalendar vs OnBootSec vs OnActiveSec

Systemd timers have multiple trigger types. The most common:

  • OnCalendar – wall-clock schedule, same concept as cron. Accepts human-readable strings: daily, weekly, Mon *-*-* 08:00:00, etc.
  • OnBootSec – relative to system boot. Useful for “run 5 minutes after startup”: OnBootSec=5min
  • OnActiveSec – relative to when the timer itself was last activated. Good for polling loops with variable runtime.
  • OnUnitActiveSec – relative to when the associated service last ran successfully.

Full calendar event syntax is documented at freedesktop.org/software/systemd/man/systemd.time.html. The systemd-analyze calendar command is useful for testing expressions before deploying them:

systemd-analyze calendar "Mon..Fri *-*-* 09:00:00"

Adding resource limits and sandboxing

One underused feature of systemd service units is the ability to constrain what the job can do. If you’re running a backup script that should never use more than a certain amount of memory or CPU, you can express that directly in the unit file:

[Service]
Type=oneshot
User=backup
ExecStart=/usr/local/bin/db-backup.sh
MemoryMax=512M
CPUQuota=25%
PrivateTmp=true
NoNewPrivileges=true

PrivateTmp=true gives the service its own /tmp mount, isolated from other processes. NoNewPrivileges=true prevents the script from gaining elevated permissions through setuid binaries. Neither of these makes sense in a crontab context – they’re systemd-native concepts.

You can go further with ProtectSystem=strict, ProtectHome=true, and ReadWritePaths= to whitelist only the directories the script needs to touch. This is overkill for a simple log rotation script but makes a lot of sense for anything that touches external network resources or processes untrusted input.

When to use which

Use cron when: the task is simple, you’re already managing a pile of crontabs and don’t want to introduce another system, you’re on a minimal container image without full systemd, or the person maintaining the server after you is more comfortable with crontab than unit files.

Use systemd timers when: you need the job to run as a specific user with resource limits (memory cap, CPU quota), you want journal logging without redirecting to a file, the job has a systemd service dependency (After=, Requires=), or you want missed-run catch-up without installing anacron separately.

For most things on a typical Linux server, either works. I tend to reach for cron for quick one-liners and systemd timers for anything that runs as part of a broader service stack. If you’re already managing the backup or maintenance script as a systemd service for other reasons, the timer is the natural companion – you already have the unit file, you just need to add a schedule.

Setting Up a Local WordPress Dev Environment in 2026

Local WordPress development used to mean XAMPP, a lot of PATH headaches, and the occasional PHP version mismatch that would eat an afternoon. These days there are at least three decent options worth knowing about: wp-env, WordPress Studio, and a hand-rolled Docker Compose setup. I’ve used all three on different projects and they each have a distinct personality.

wp-env: the official Node-based option

wp-env ships as part of the Gutenberg tooling and is maintained by the WordPress core team. If you’re building blocks or plugins, it’s the obvious first choice – it creates a pair of WordPress installs (one for development, one for testing) and wires them up automatically.

Install it globally or per-project:

npm install -g @wordpress/env
# or locally
npm install --save-dev @wordpress/env

Then drop a .wp-env.json in your plugin or theme directory:

{
  "core": "WordPress/WordPress#6.5",
  "plugins": [ "." ],
  "themes": [],
  "config": {
    "WP_DEBUG": true,
    "WP_DEBUG_LOG": true
  },
  "port": 8888
}

Run wp-env start and you get WordPress at localhost:8888. The test environment lives at localhost:8889. Credentials are always admin / password – fine for local use.

What I like: zero fussing with Docker Compose files, built-in WP-CLI access via wp-env run cli wp ..., and it respects the wp-env.override.json pattern so you can have personal overrides without polluting the repo. What I don’t like: it’s opinionated about the directory structure, and if you’re working on a full site (not just a plugin), it can feel constraining. Documentation is at developer.wordpress.org.

WordPress Studio

WordPress Studio is a desktop GUI app from Automattic, released in 2024. Think of it as the spiritual successor to Local (by Flywheel) but leaner. You click “Add site”, give it a name, pick a PHP version, and it’s running in under a minute. No terminal required.

It’s good for: designers who need to test a theme, clients who want to poke around locally, or anyone who doesn’t want to maintain a Docker setup. For developers who live in the terminal, it’s fine but not particularly useful – you’ll end up opening a shell anyway to run WP-CLI or install Composer packages.

One practical limitation: Studio manages its own PHP and MySQL binaries, which means you can’t easily add PHP extensions or customize php.ini beyond what the UI exposes. If you need xdebug or a custom Redis object cache, Docker is a better fit.

Docker Compose: more setup, more control

I switched to Docker Compose for most client projects a couple of years back because it gives you a docker-compose.yml that lives in the repo and documents exactly what the environment looks like. New team member? docker compose up -d and they’re running.

Here’s a minimal but usable compose file for WordPress development:

services:
  db:
    image: mysql:8.0
    restart: unless-stopped
    environment:
      MYSQL_ROOT_PASSWORD: rootpass
      MYSQL_DATABASE: wordpress
      MYSQL_USER: wp
      MYSQL_PASSWORD: wp
    volumes:
      - db_data:/var/lib/mysql

  wordpress:
    image: wordpress:6.5-php8.2-apache
    restart: unless-stopped
    ports:
      - "8080:80"
    environment:
      WORDPRESS_DB_HOST: db
      WORDPRESS_DB_USER: wp
      WORDPRESS_DB_PASSWORD: wp
      WORDPRESS_DB_NAME: wordpress
      WORDPRESS_DEBUG: 1
    volumes:
      - ./wp-content:/var/www/html/wp-content
      - ./uploads.ini:/usr/local/etc/php/conf.d/uploads.ini

  cli:
    image: wordpress:cli-php8.2
    depends_on:
      - db
      - wordpress
    volumes:
      - ./wp-content:/var/www/html/wp-content
    entrypoint: wp
    command: "--info"

volumes:
  db_data:

The uploads.ini file handles the classic “max upload size” problem:

file_uploads = On
memory_limit = 256M
upload_max_filesize = 64M
post_max_size = 64M
max_execution_time = 600

Mount only wp-content rather than the entire WordPress root – it keeps the volume lean and avoids accidentally overwriting core files. WP-CLI runs as a separate service to avoid permission issues that crop up when you run it from inside the main container.

For Xdebug, add this to the wordpress service and rebuild:

  wordpress:
    build:
      context: .
      dockerfile: Dockerfile.dev
# Dockerfile.dev
FROM wordpress:6.5-php8.2-apache
RUN pecl install xdebug \
 && docker-php-ext-enable xdebug
COPY xdebug.ini /usr/local/etc/php/conf.d/xdebug.ini

Docker’s own docs on volumes and networking cover the edge cases well: docs.docker.com/storage/volumes.

A note on database persistence and resets

One thing that bites people new to container-based WordPress dev: when you run wp-env clean all or docker compose down -v, you lose the database. That’s usually intentional – you want a clean state for tests – but it can be surprising the first time it happens on a project where you’d spent an hour importing a client’s database and configuring plugins.

For wp-env, use wp-env stop and wp-env start to pause and resume without destroying state. For Docker Compose, docker compose down without the -v flag preserves the named volume. I’ve started keeping a make db-export target in client projects that runs:

docker compose exec db mysqldump -u wp -pwp wordpress > ./db/snapshot.sql

And a corresponding make db-import that loads it back. Adds five minutes to the initial setup and has saved me multiple times.

Syncing with a staging environment

Local dev is only useful if it resembles production. For most WordPress projects that means getting the production database down to local, with URLs replaced. wp-env and Docker Compose both give you WP-CLI access, so the standard approach works in either case:

# after importing the prod DB dump
wp search-replace 'https://client-site.com' 'http://localhost:8080' --skip-columns=guid

A few things to watch: the --skip-columns=guid flag is important – replacing GUIDs breaks WordPress attachment tracking. Also run wp cache flush after the replace, because some plugins (object cache, page cache) may have stale URLs stored.

If you’re working with WooCommerce or a plugin that stores serialized URLs in the database, add --precise to the search-replace command. The default regex-based replacement can corrupt serialized data.

Which one to pick

If you’re building a Gutenberg block or a plugin and want to run automated tests, use wp-env – it’s the path of least resistance and the tooling integrates cleanly with @wordpress/scripts. If you’re handing off a site to a non-developer or want something that just works with a double-click, WordPress Studio is hard to argue with. If you’re working on a production-grade site, collaborating with a team, or need precise control over the PHP configuration, Docker Compose is worth the initial setup cost.

My day-to-day is mostly Docker Compose with the wp-env config checked into plugin repos for CI. Studio I keep installed for the occasional “can you quickly check how this looks in WordPress” request. All three tools have improved noticeably over the last year – the gap between them is narrower than it used to be, which is a good problem to have.

Payment API Integration: What Developers Need to Know

Choosing a payment API is a real technical decision: the API design, card network coverage, documentation quality, and features like idempotency and webhooks all determine how smooth your integration goes and how resilient your payments are in production. This guide covers what to evaluate before you commit – and the mistakes that slow down go-live.

Key takeaways

  • A REST payment API lets your application communicate directly with a payment processor – no redirect, full control over the checkout experience.
  • Card network coverage (Visa, Mastercard, Amex, JCB, UnionPay) and tokenisation support are baseline requirements before signing any integration agreement.
  • Idempotency keys prevent double-charges on retries; webhooks keep your internal state accurate for async events like settlement, refunds, and disputes.
  • Client-side SDK tokenisation is the recommended pattern for most teams – card data never touches your server, minimising PCI scope.
  • Spend real time in the sandbox before going live: test declined cards, refunds, webhook delivery, and edge cases – not just the happy path.

You’ve decided to integrate payments directly into your product rather than bolt on a third-party checkout. Good call. Full API control means you can build exactly the experience your users expect – no redirects, no mismatched branding, no “you are now leaving our site” moment right before the customer hands over money.

But choosing a payment API is a real decision, not just a line in the sprint plan. The API design, the card networks it supports, and the quality of the documentation all affect how long integration takes and how resilient your payments are in production. Here’s what to look at before you commit.

What Is a Payment API?

A payment API is an interface that lets your application communicate with a payment processor programmatically. Instead of routing customers to a separate checkout page, you send requests to the payment provider’s servers and receive structured responses – authorisation, decline, error code – that your application acts on directly.

The standard today is a REST payment API: stateless HTTP requests, JSON payloads, predictable status codes. If a provider still uses SOAP or custom XML, that’s a compatibility signal worth noting.

A payment API typically handles several distinct operations: creating a payment intent, capturing funds, issuing refunds, retrieving transaction history, and managing saved payment methods (tokens). How cleanly those operations are separated in the API design tells you a lot about how maintainable your integration will be six months after go-live.

How a Payment API Works: The Request/Response Flow

The flow varies slightly by provider and payment method, but the core pattern is consistent.

Your server sends a request to create a charge – something like:

POST /v1/payments
{
  "amount": 5000,
  "currency": "SGD",
  "payment_method_id": "pm_abc123",
  "capture": true
}

The payment provider’s gateway routes that request to the relevant card network (Visa, Mastercard, Amex, JCB, UnionPay), which checks with the issuing bank. The bank returns an authorisation response, the network relays it through the gateway, and your API response arrives – typically within two seconds – with a status of succeeded or failed and enough detail to act on.

For saved cards and subscriptions, the same flow uses a token instead of raw card data. The token references card details held in the provider’s vault; your server never sees the actual card number. That is how API payment processing for recurring billing works safely at scale.

Key Capabilities You Should Expect from a Payment API

Not all payment APIs are built the same. Before signing an integration agreement, verify these points:

Card network coverage. If you’re building for a global audience, you need Visa, Mastercard, Amex, JCB, and UnionPay. JCB is widely used in Japan; UnionPay is essential for Chinese consumers. A provider covering only Visa and Mastercard will leave gaps you’ll notice in your decline rate.

Tokenisation. Any payment API for developers doing recurring billing or saved-card flows must return a stable token you can store against a customer record. Ask whether network tokenisation is supported – where the card networks themselves update tokens automatically when cards are reissued, reducing failed renewals.

Idempotency. Payments are not good candidates for retrying blindly. A well-designed REST payment API supports idempotency keys – a client-generated ID you include in the request header. If the same request is sent twice (network retry, duplicate submission), the provider deduplicates and returns the original response rather than charging twice.

Webhooks. API responses confirm immediate authorisation, but settlement, refunds, and disputes happen asynchronously. You need webhooks – server-to-server event notifications – to keep your internal state accurate without polling.

API payment documentation quality. This one is underrated. Clear reference docs, a working sandbox, and realistic code examples in your language of choice will save days of integration time. If the docs are sparse or the sandbox is broken, that’s a production risk in waiting.

Integration Patterns: SDK, Server-Side, and Embedded

There are three common ways to embed payments via API, and the right one depends on how much control you want over the checkout experience.

Server-side only. Your frontend collects payment details, passes them to your backend, and your backend calls the payment API. Gives full control, but puts card data on your servers – which means a higher PCI compliance burden. Only appropriate if you’re running PCI DSS Level 1 or working with a tokenisation layer that intercepts data before it hits your backend.

SDK / client-side tokenisation. A JavaScript SDK or mobile SDK sits on your checkout page. It captures card details directly, tokenises them in the browser or device, and sends only the token to your backend for the charge. Card data never touches your server. This is the recommended pattern for most teams.

Embedded iframes (hosted fields). The provider renders secure input fields inside your page. From the user’s perspective, it looks like your checkout. From a compliance standpoint, the sensitive fields live in an iframe served from the provider’s domain. Low PCI scope, seamless UX.

For very early stages, payment links and hosted checkout pages are worth knowing about too – lower integration effort, same underlying payment infrastructure, useful for prototyping or low-volume flows before the full API integration is ready.

Going Live: Sandbox Testing and API Keys

Every serious payment provider maintains a sandbox environment that mirrors production without moving real money. You should spend real time there before going live – test declined cards, test refunds, test webhook delivery, test edge cases (expired card, insufficient funds, network timeout).

Most payment APIs use two key pairs: a sandbox API key and a production API key. Keep them strictly separate in your environment configuration. A common mistake is accidentally charging real cards in development because an environment variable points to production. Sandbox keys should never appear in production configs; production keys should never appear in local development.

When you move to production, confirm the key rotation policy. API keys that never expire are a security liability; good providers let you rotate keys without downtime.

Start Building with ONE Payments

ONE Payments offers a REST API built for developers integrating payments into products – covering Visa, Mastercard, Amex, JCB, and UnionPay, with tokenisation, embedded finance options, and no setup fee to get started. If you’re evaluating payment API options or ready to begin integration, the ONE Payments API docs are the right starting point.

For reference on REST architectural conventions that underpin modern payment APIs, see the Wikipedia article on REST.

Related reading